Proper lighting design starts with photometric analysis. It ensures efficient light distribution, energy savings, and compliance with safety standards. A photometric plan helps visualize how light spreads across a space, allowing designers to optimize fixture placement and minimize unnecessary energy use.
In this guide, we will explain what photometric analysis is, how it works, and why it matters in professional lighting design.
What is Photometric Analysis and Why is It Important?
Photometric analysis is the process of evaluating light distribution in a given area. It provides a detailed photometric plan that includes:
- Illumination levels (foot-candles or lux)
- Uniformity ratios
- Light distribution patterns
By using photometric analysis, designers can ensure that lighting placement is optimized, energy consumption is minimized, and regulations are met.

How to Create an Accurate Photometric Plan
1. Understanding the Space
Before performing a photometric analysis, it is essential to understand the space. Consider the following:
- Size and layout
- Required light levels
- Outdoor vs. indoor conditions
For outdoor lighting, tools like Google Earth help determine site dimensions.
Example: Parking Lot Lighting Design
For a 1.5-acre church parking lot, several factors must be considered:
- Pole placement for even lighting
- 20-foot mounting height to reduce glare
- 0 foot-candles at the property line to prevent spillover
Using photometric analysis, we determine that four poles with 150W, 22,000-lumen LED fixtures (Type III optics) provide uniform coverage while ensuring compliance.

2. Determining Lighting Requirements
The next step involves setting key lighting specifications:
Compliance with energy and safety codes
Color temperature (warm, neutral, or cool)
Light intensity based on use (task lighting, security, general illumination)
3. Choose the Right Fixtures
Selecting the correct fixtures is crucial for achieving balanced illumination. Key considerations include:
- Fixture shape and size
- Beam angle and light distribution
- Photometric properties (candela values, cutoff angles, efficiency)
For parking lots, Type III optics are ideal. They distribute light evenly while preventing unnecessary brightness outside the target area.
4. Using Photometric Analysis Software
To ensure accuracy, designers use specialized software for photometric analysis. These tools help simulate real-world conditions and refine fixture placement.
Common programs include:
- DIALux EVO – Free, user-friendly, and ideal for 3D rendering
- AGi32 – Advanced calculations with in-depth reporting

By using these tools, designers can adjust layouts before installation, ensuring efficiency and compliance.
5. Review the Photometric Analysis
Once the photometric analysis is complete, the results must be analyzed. The plan should:
✔ Ensure regulatory compliance
✔ Verify lighting uniformity
✔ Confirm energy efficiency
For outdoor projects, it is vital to check that property boundaries meet the required 0 foot-candle level to prevent light pollution.
How to Read a Photometric Plan
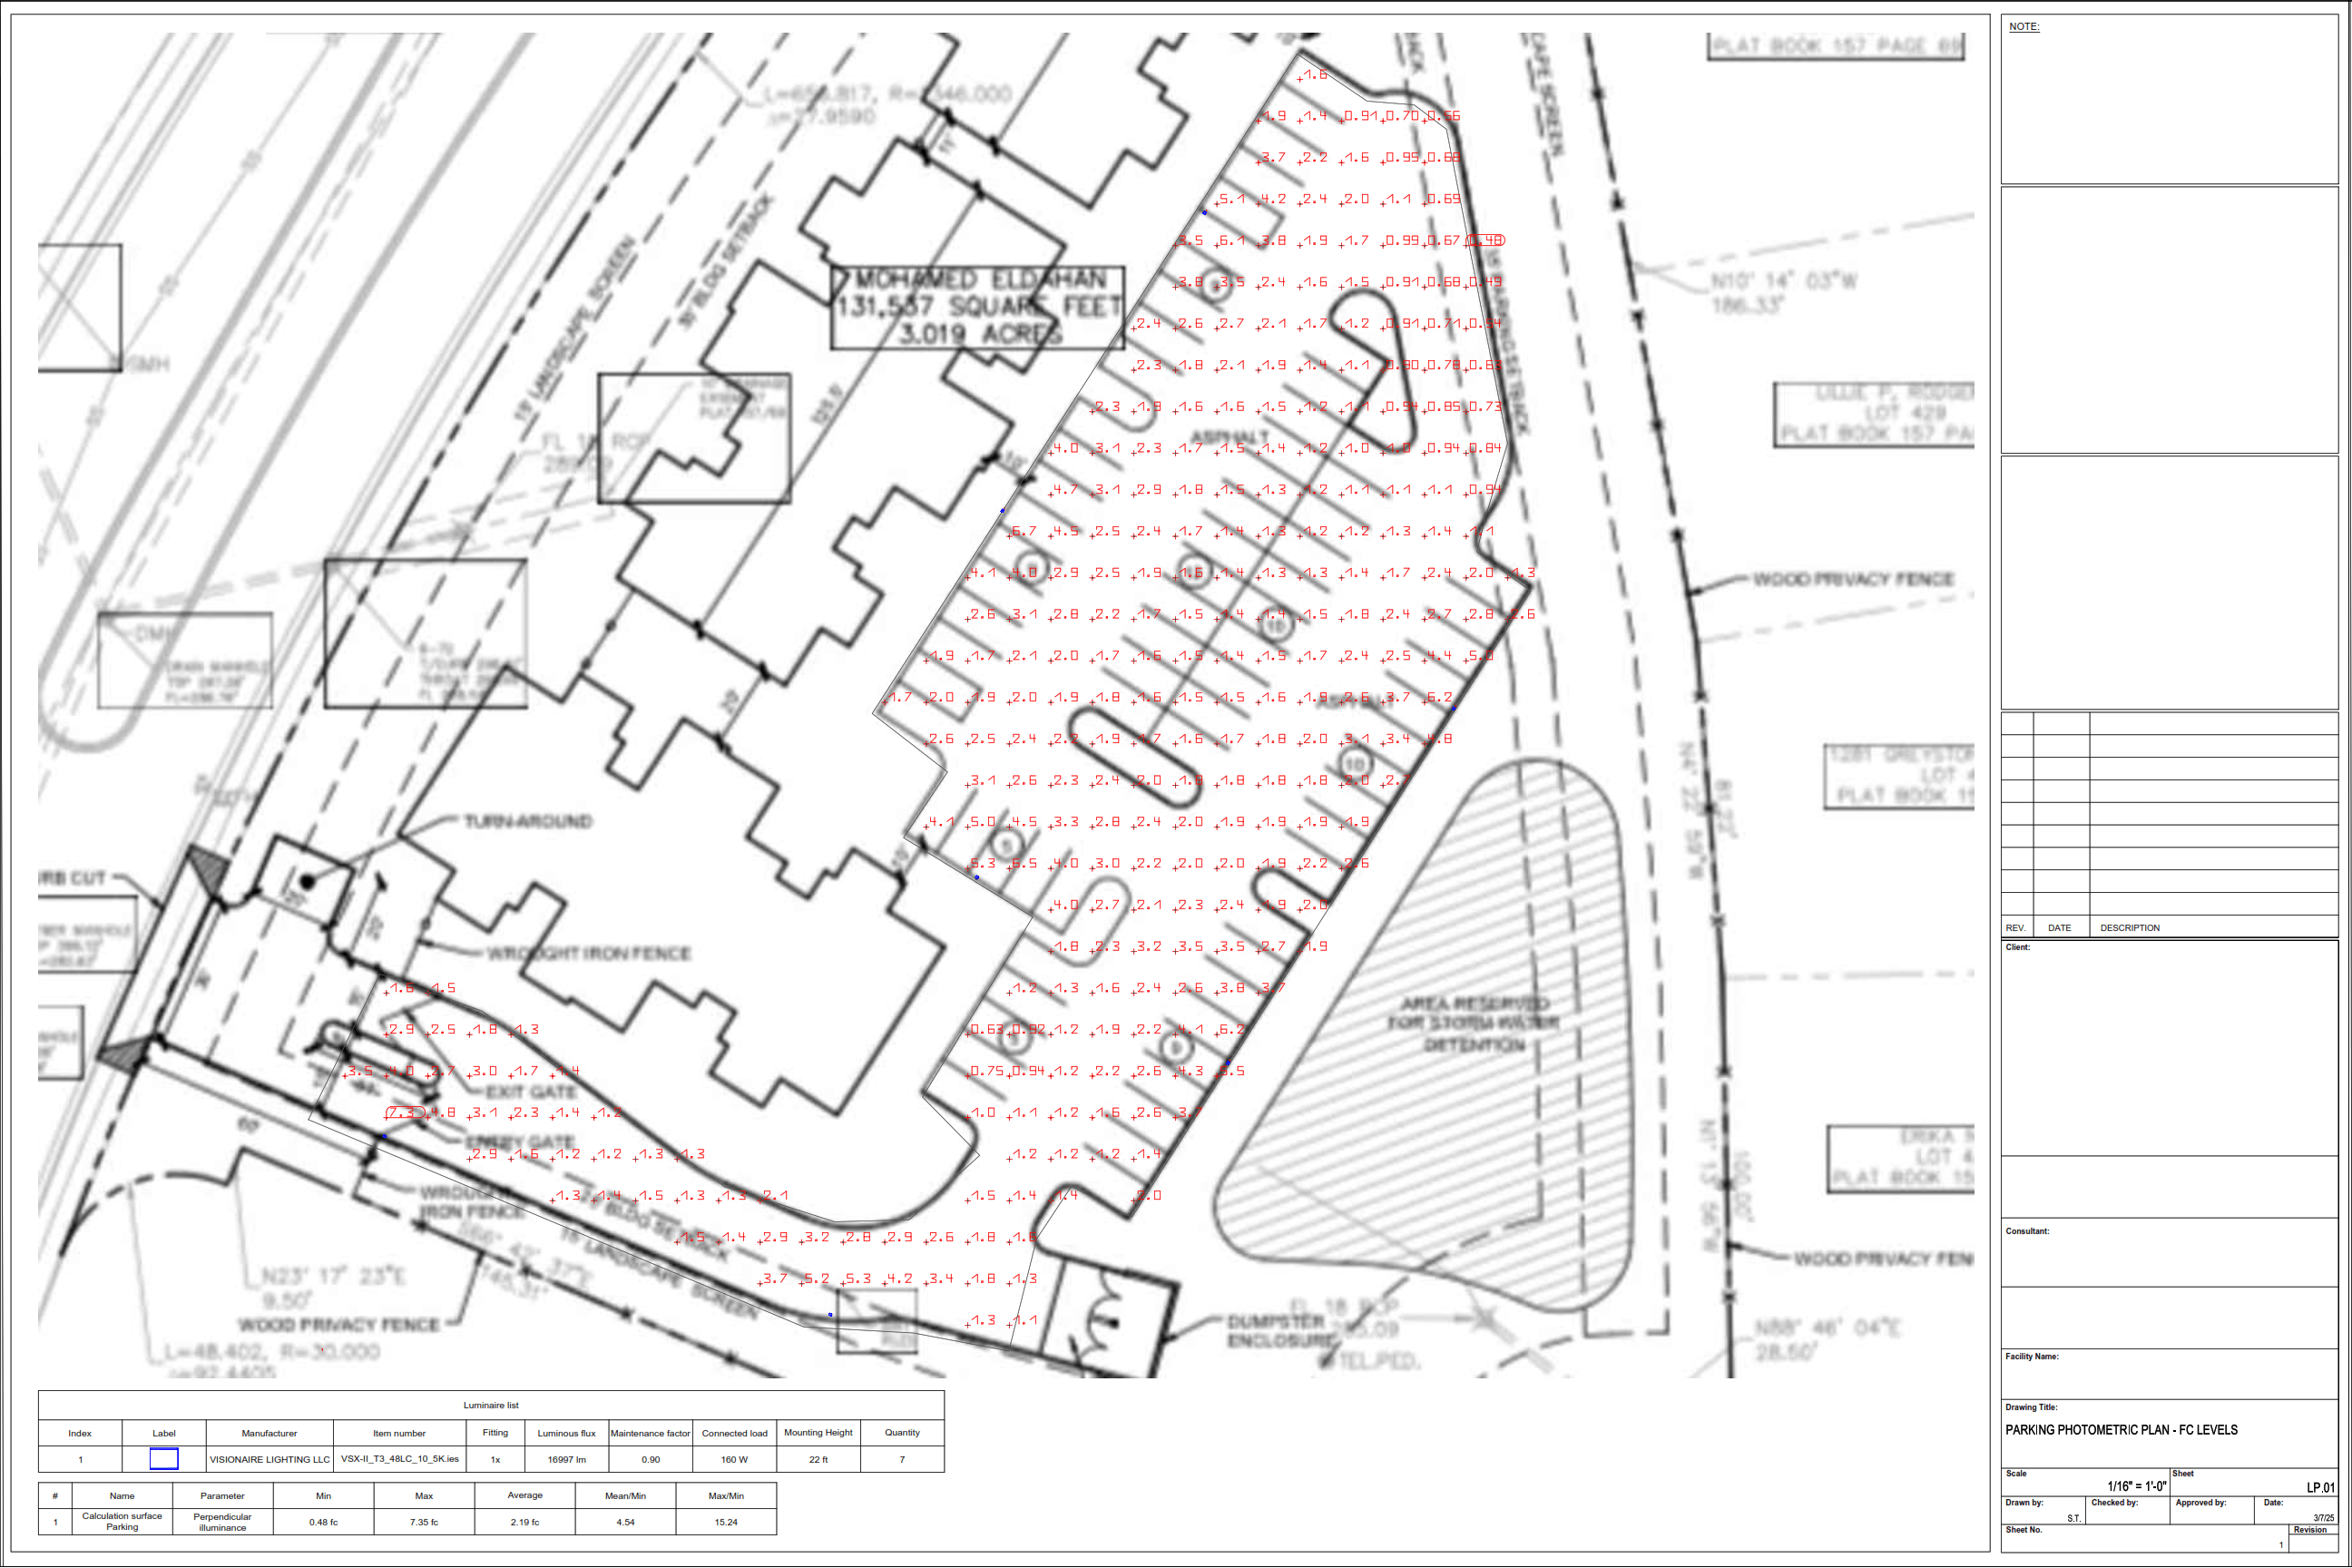
A photometric plan consists of multiple data points that help evaluate lighting effectiveness. Key components include:
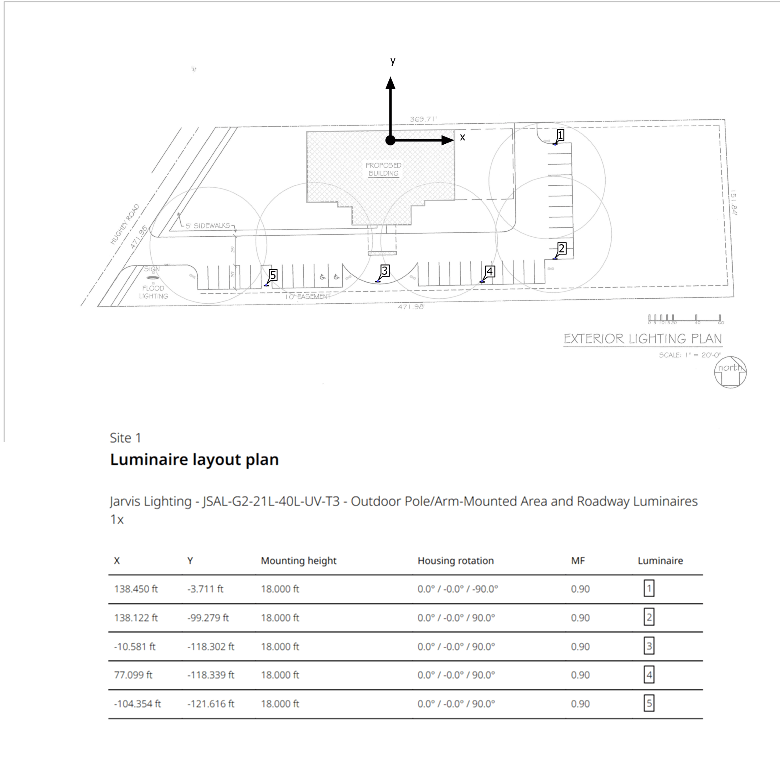
1. Lighting Layout
The first page of a photometric plan typically provides an overview of the site, displaying:
✔ Fixture placement and mounting heights
✔ Light output levels in foot-candles (fc)
✔ Area boundaries and compliance zones

2. 3D Lighting Simulation
A 3D photometric analysis offers a visual representation of how the space will be illuminated.
- False Color Rendering makes it easy to identify dark spots or over-lit areas.

3. Calculation Points
These points indicate foot-candle levels at specific locations, ensuring balanced lighting.
Example: Gas Station Canopy Lighting
For this Gas Station project, proper visibility is crucial. 20-30 foot-candles are recommended for fueling areas to ensure safety and even brightness. Maintaining consistent illumination helps improve visibility for drivers and pedestrians.
Click here to learn more about recommended foot-candle values for different applications.

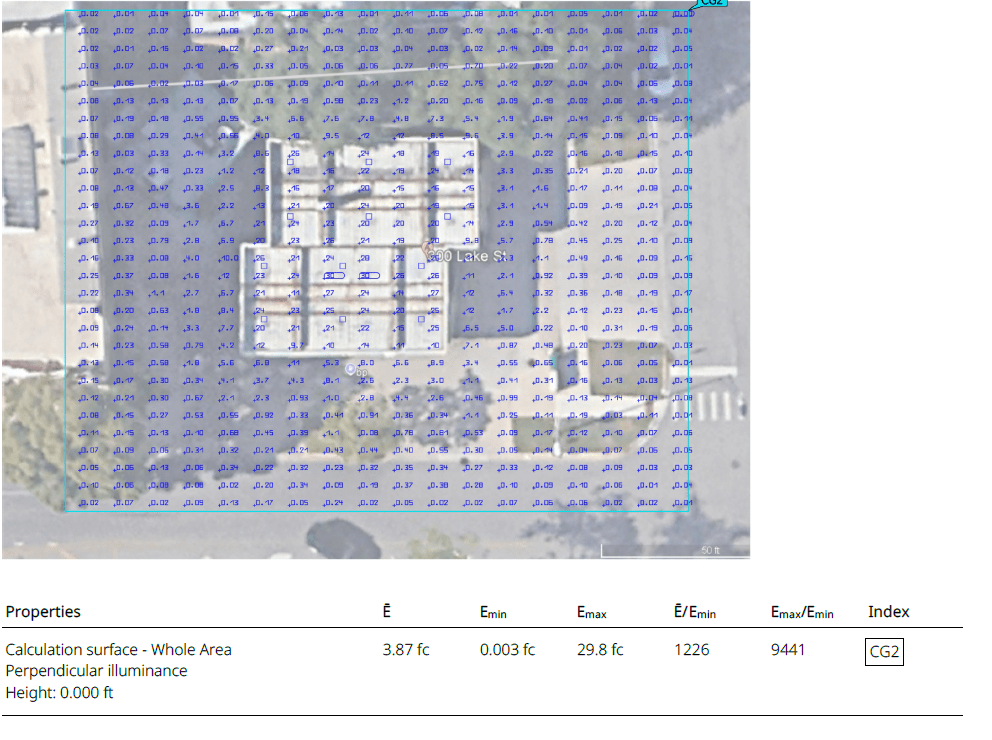
4. Calculation Surface
The calculation surface is a critical component of photometric analysis, as it evaluates light distribution, uniformity, and overall illumination quality within a given area. This section helps determine whether the lighting system meets design goals and regulatory requirements for visibility, safety, and energy efficiency.
Key metrics used to assess the calculation surface include:
- Ē (Average Foot-Candle Level) – Represents the overall lighting performance by calculating the average illumination across the entire surface. A well-balanced Ē ensures that spaces receive adequate lighting without excessive brightness or dark spots.
- Emax (Maximum Foot-Candle Value) – Identifies the brightest point within the calculation area. A high Emax may indicate potential glare issues, especially in environments requiring uniform illumination, such as parking lots or fueling stations.
- Ē/Emin (Average/Minimum Ratio) – Measures the uniformity of light distribution by comparing the average illumination to the lowest recorded value. A lower ratio indicates more consistent lighting across the space, reducing areas of under-illumination.
- Emax/Emin (Maximum/Minimum Ratio) – Evaluates the balance of light distribution by comparing the brightest and darkest points within the space. A lower Emax/Emin ratio is desirable, as it prevents stark contrasts between different areas, ensuring a more comfortable and evenly lit environment.
A well-optimized calculation surface contributes to better visibility, reduced glare, and improved energy efficiency. By ensuring an appropriate Emax/Emin ratio, lighting designers can create a visually comfortable space that meets both functional and aesthetic requirements.
Why is Photometric Analysis Important?
✔ Energy Efficiency – By preventing over-lighting, it helps reduce costs and minimizes unnecessary energy consumption.
✔ Safety Compliance – Proper lighting ensures visibility for both pedestrians and vehicles, reducing accident risks.
✔ Improved Visual Comfort – Glare reduction enhances aesthetics and creates a more pleasant environment.
✔ Light Pollution Control – Meeting dark sky regulations prevents unwanted spillover and maintains responsible outdoor illumination.
How Long Does It Take to Complete a Photometric Plan?
The timeframe depends on the size and complexity of the project:
✔ Small projects (e.g., single-room lighting) – a few hours
✔ Mid-sized commercial spaces – 1-2 days
✔ Large-scale outdoor lighting projects – several days
At Stetra Lighting, we typically deliver photometric plans within 1 to 3 days, ensuring precision, compliance, and efficiency.
For a quick estimation of your indoor lighting project try our free Lumen Calculator.
Conclusion
Photometric analysis is a crucial part of professional lighting design. A well-prepared photometric plan enhances efficiency, ensures compliance with industry standards, and improves overall visibility. Whether designing for commercial, residential, or outdoor spaces, photometric analysis helps achieve optimal lighting performance, energy savings, and regulatory compliance.
Need a detailed photometric plan? Fill out the form below by clicking on the buttom, and we’ll reach out to you immediately—we’re here to help!
