What Is a Photometric Plan? Simple Guide for Permits & Design
A photometric plan is a technical lighting document that shows how light is distributed across a space. It is used by lighting designers, engineers, and code officials to verify that a lighting system meets required performance, safety, and visibility standards.
Photometric plans are based on real fixture data, usually from IES files, and calculated using professional lighting software. They are commonly required for commercial, industrial, and outdoor lighting projects before permits are approved.
This guide explains what a photometric plan is, what it includes, how it is created, how to read it, and why it is important for permits and lighting design.
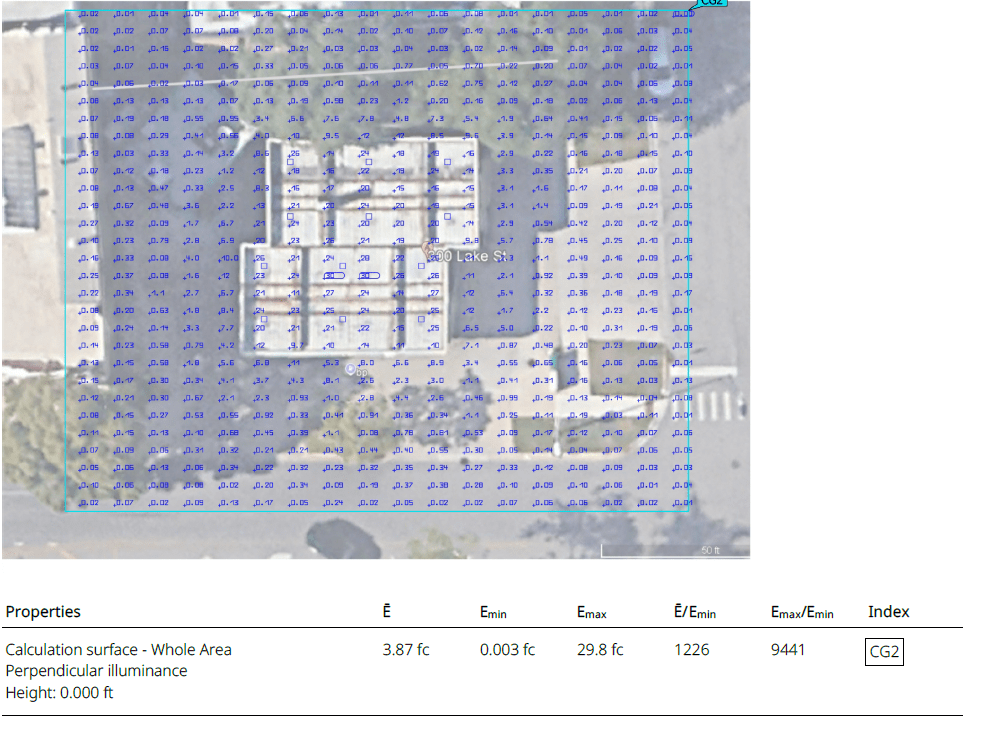
This example shows how foot-candle values are distributed across a site. Lighting designers, engineers, and plan reviewers use this type of calculation to check visibility, uniformity, and overall lighting performance.
What Is a Photometric Plan?
A photometric plan is a drawing that visually represents light levels across a defined area. It shows how much light reaches the ground, floor, or working surface from installed fixtures.
A standard photometric plan usually displays:
- Light levels in foot-candles (fc) or lux
- Fixture locations and mounting heights
- Uniformity ratios
- Dark zones, bright spots, and overlaps
Designers use photometric plans to adjust fixture spacing, optics, aiming, and quantities to achieve more consistent and code-compliant lighting.
Need a professional lighting layout with accurate calculations? Click the button below to get started.
Order Your Photometric PlanWhat a Professional Photometric Plan Includes for Permits
A professional photometric plan usually includes the core lighting information needed for design review, permit approval, and project coordination.
Fixture Schedule: A list of the lighting fixtures used in the project, often linked to the manufacturer’s IES files and product data.
Calculated Light Levels: Light levels shown on a defined calculation grid to illustrate how illumination is distributed across the area.
Foot-Candle Values: The average, minimum, and maximum foot-candle values that help evaluate overall lighting performance.
Uniformity Ratios: Ratios used to evaluate how evenly light is distributed across the space.
Notes for Reviewers: Project notes that help explain the layout, fixture selection, and design intent.
Additional elements for outdoor projects:
- Property lines to show project boundaries
- Light trespass checks where spill light control is important
- Spill and glare control considerations for visual comfort and compliance
This type of documentation helps engineers, contractors, and reviewers understand how the proposed lighting system is expected to perform before installation.
Why this helps with approval
Submitting a clear and accurate photometric plan can help reduce questions during the review process. It gives the project team a technical document that translates the lighting design into measurable results.
For projects that need technical support, Stetra Lighting provides photometric plans based on real fixture data and project-specific requirements. When you order a permit-ready photometric plan, you receive a lighting analysis prepared to support design review and project coordination.
Process of Creating Photometric Plans
Designers follow a systematic process to create accurate and dependable photometric plans. The process usually includes the following steps:
1. Understanding the Space
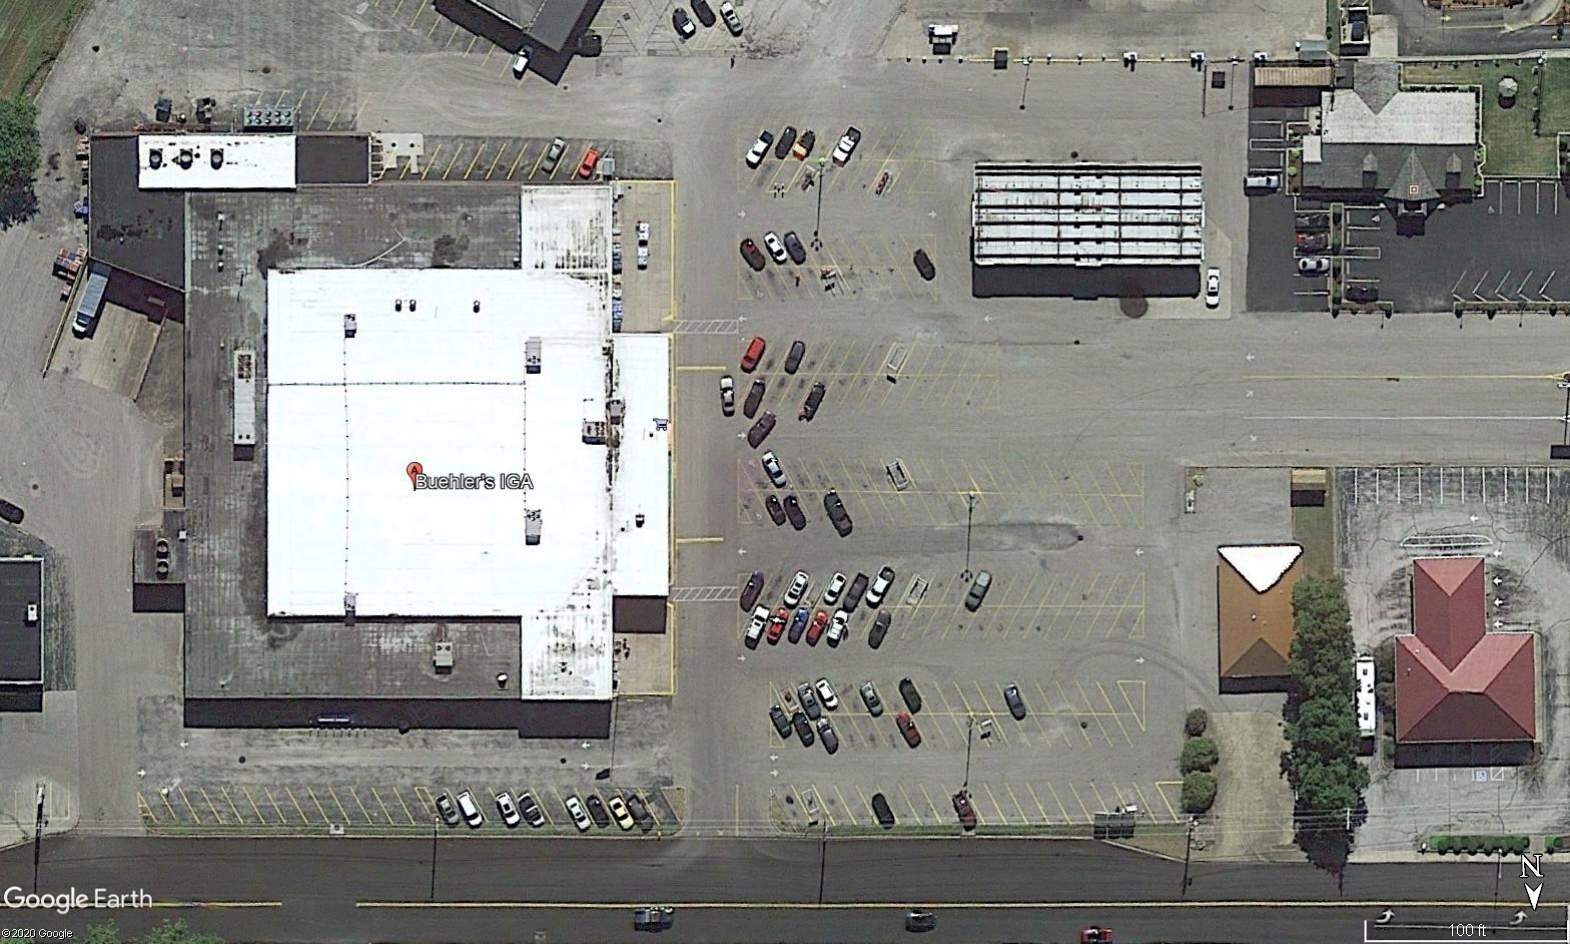
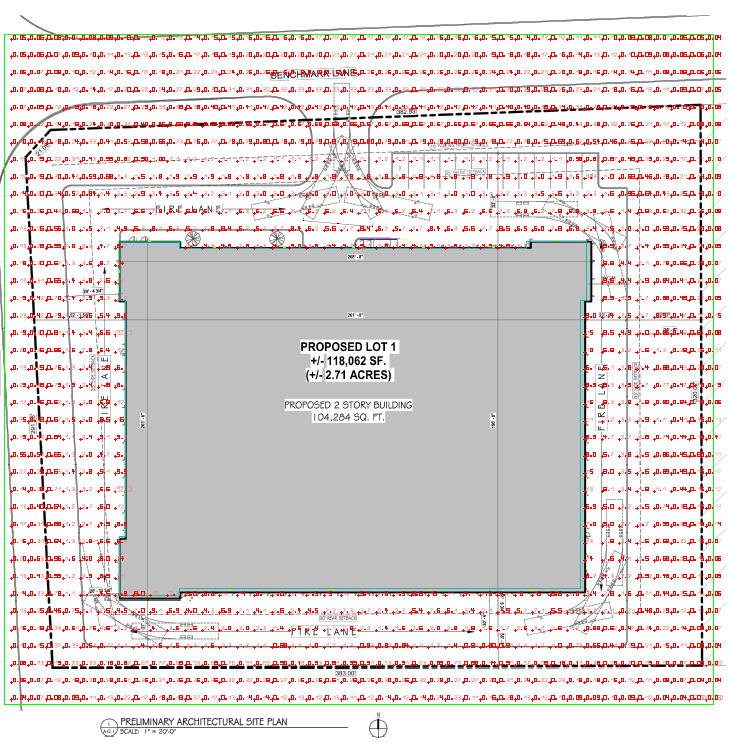
The first step is to gather information about the space, including the layout, dimensions, site conditions, and intended use. For outdoor projects such as parking lots or site lighting, designers often use scaled aerial images or CAD site plans.
2. Determining Lighting Requirements
The next step is to define the target light levels and performance goals. These are typically influenced by:
- The function of the space
- Safety and visibility needs
- Project requirements and local review criteria
These factors help establish target foot-candle levels, lighting uniformity, and other design goals.
3. Selecting Appropriate Fixtures
Fixture selection usually depends on several key factors:
- Mounting height
- Beam angle and light distribution pattern
- Output, efficiency, and application suitability
Each fixture’s photometric data, contained in an IES file, helps determine how light will be distributed throughout the project area.
4. Using Photometric Software
Lighting design software is then used to simulate how light will be distributed based on fixture placement and photometric characteristics. This step produces the actual photometric plan and calculation results.
5. Reviewing and Adjusting Results
Finally, designers review the results and adjust fixture spacing, aiming, optics, or quantities as needed until the layout meets the project goals.
Photometric Plan vs Photometric Report
The terms photometric plan and photometric report are often used together, but they are not always exactly the same.
A photometric plan usually refers to the drawing page that shows the fixture layout, point-by-point foot-candle or lux values, and the calculation surface. A photometric report can include that plan plus supporting pages such as fixture schedules, product data, calculation summaries, and project notes.
In many lighting projects, the photometric plan is one part of the full photometric report package submitted for review, coordination, or permit support.
What Information Is Needed for a Photometric Plan?
To prepare an accurate photometric plan, the designer usually needs complete project information before calculations begin.
- A site plan, floor plan, or scaled background in PDF, CAD, or image format
- Fixture specifications or selected fixture models
- IES files for the luminaires
- Mounting heights and fixture locations
- Project dimensions and layout details
- Target foot-candle or lux levels, if known
- Any permit, code, or property-line requirements
- Any light trespass, glare, or spill-light concerns
The more accurate the project inputs are, the more reliable and permit-ready the final photometric plan will be.
Photometric Analysis and Why It Matters
Photometric analysis is the calculation process used to predict how light will behave in a space before installation. It uses fixture photometric data, mounting height, aiming, spacing, and surface geometry to calculate illuminance levels and lighting uniformity.
In simple terms, the analysis is the calculation process, and the photometric plan is the document that presents the result. This is why the two terms are closely related in lighting design.
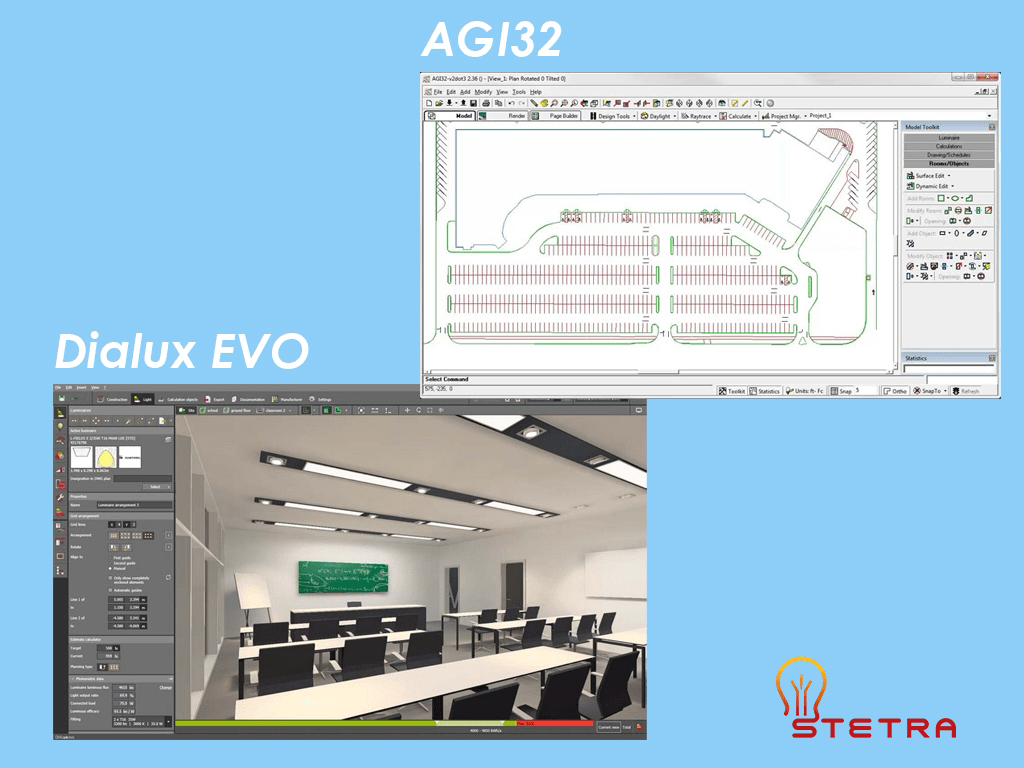
Which Software Is Used to Create Photometric Plans?
Two of the most widely used lighting software tools are DIALux EVO and AGi32.
- DIALux EVO
Widely used for architectural and site lighting projects. - AGi32
Used for detailed lighting calculations and advanced analysis.
Both programs use IES photometric data and can generate photometric plans with point-by-point calculations, false-color analysis, and summary tables.
If needed, a more detailed software comparison can be covered in a separate article. On this page, the most important point is that photometric plans are created using real fixture data and professional calculation software.
How to Read a Photometric Plan
A photometric plan contains several key elements that designers, contractors, and reviewers look at when evaluating the lighting design.
1. Lighting Layout
This section shows fixture locations, mounting heights, and coverage areas. Designers position fixtures to achieve more even illumination and reduce dark spots.
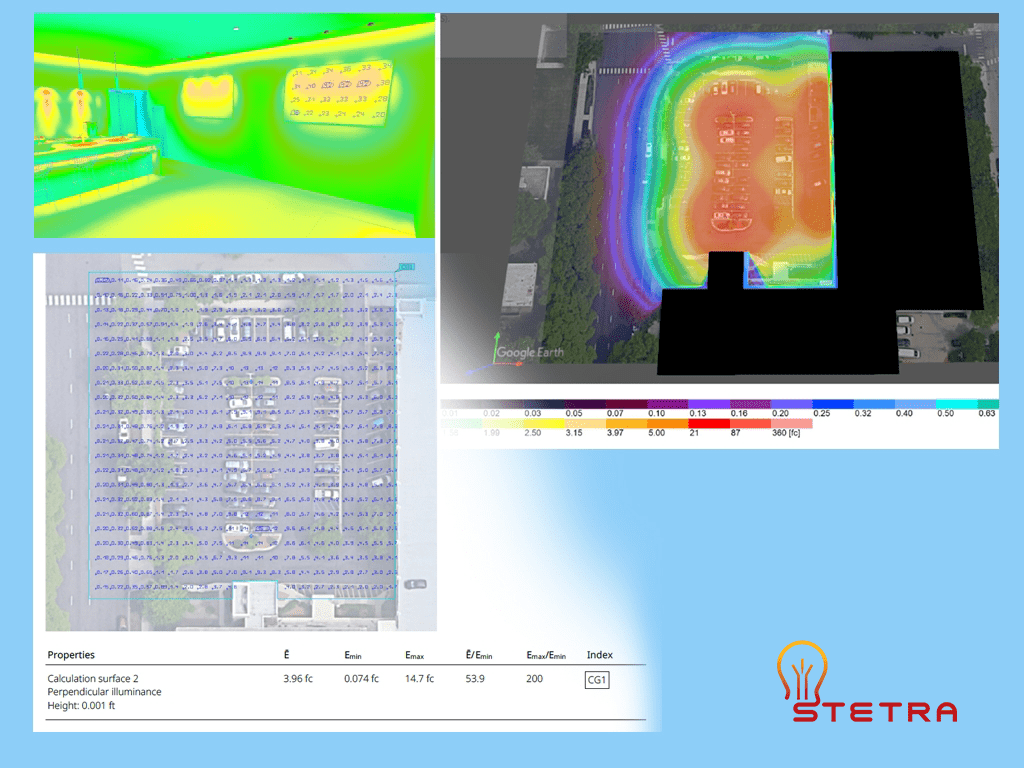
2. 3D Presentation
3D views help visualize how the lighting may appear once installed. They are useful for presentation and coordination, but they do not replace calculated lighting results.
These views can help identify design issues early and support decision-making before installation.
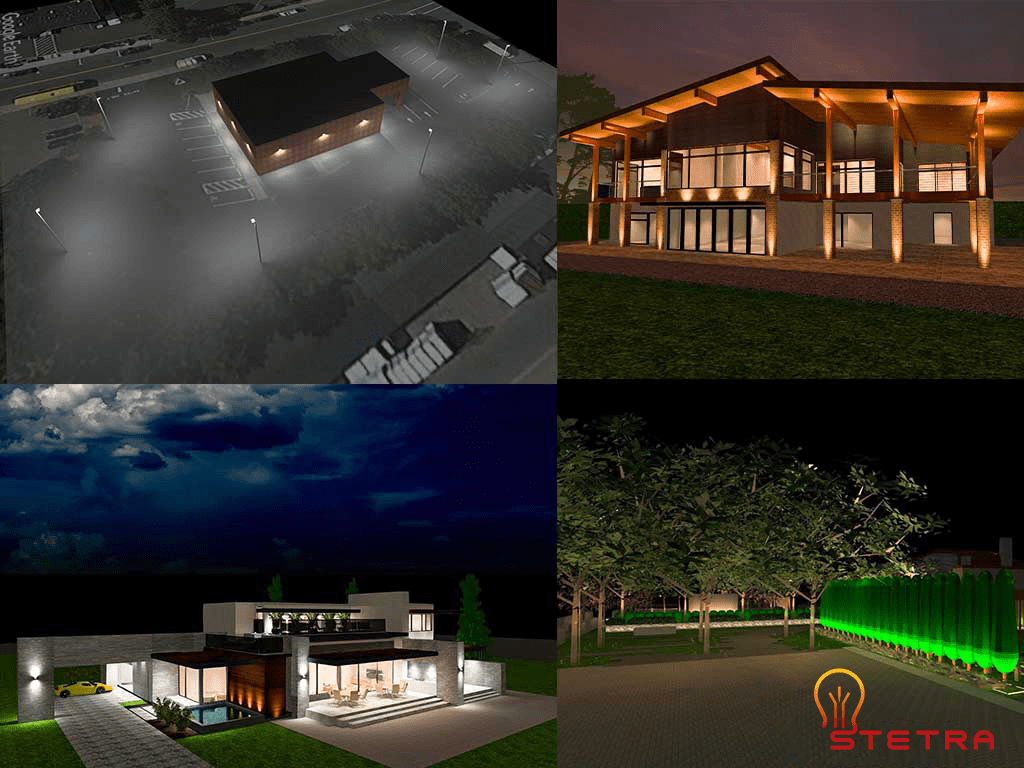
3D lighting presentations are useful for visualization, but photometric plans and false-color analysis provide the calculated data used to evaluate light levels and lighting performance.
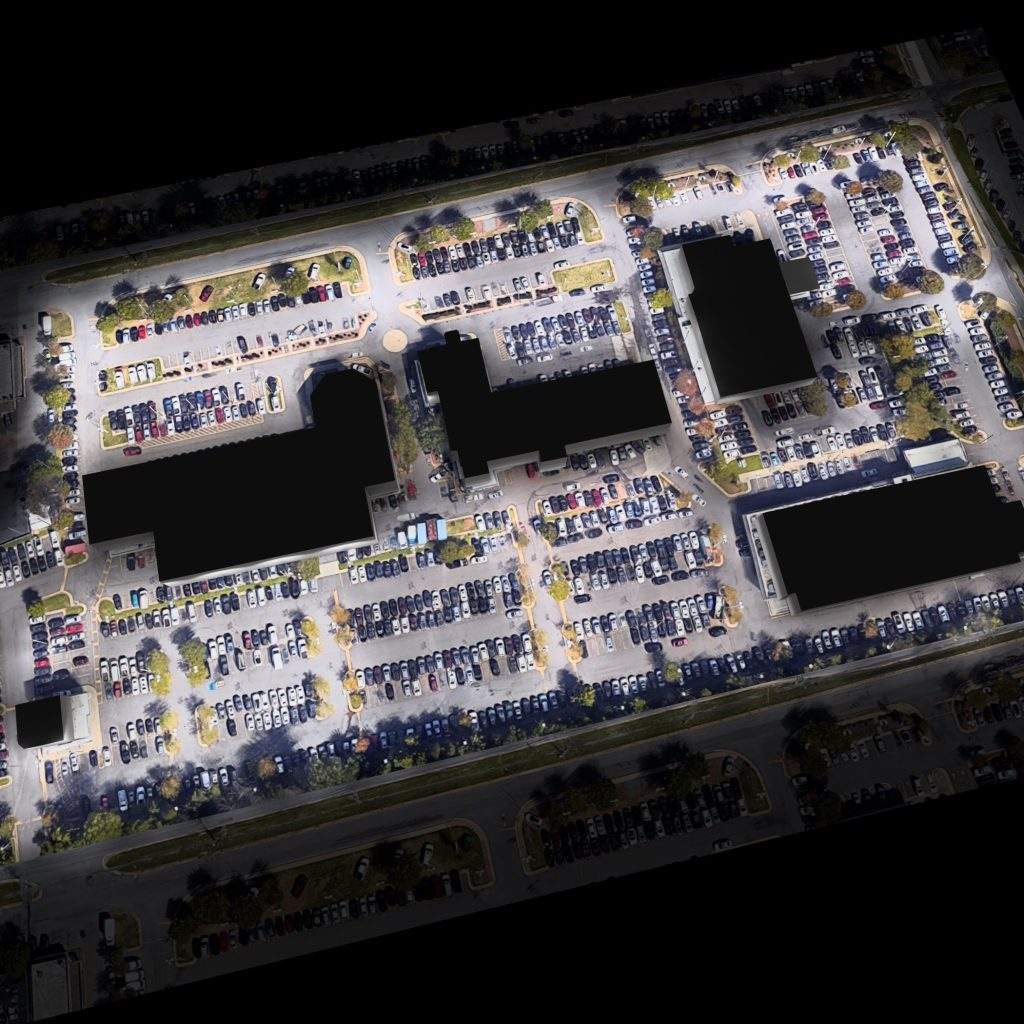
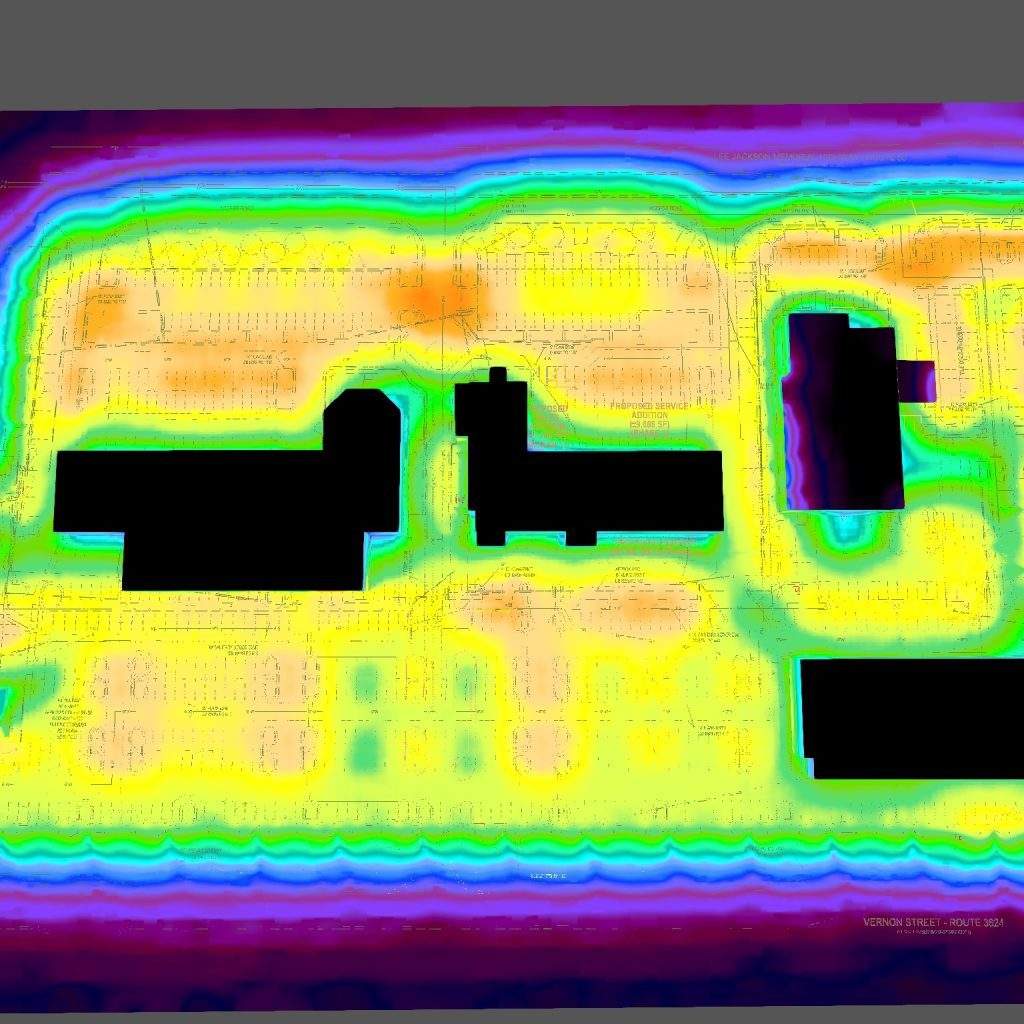
False-color photometric analysis is commonly used to evaluate light distribution and lighting uniformity in outdoor lighting projects.
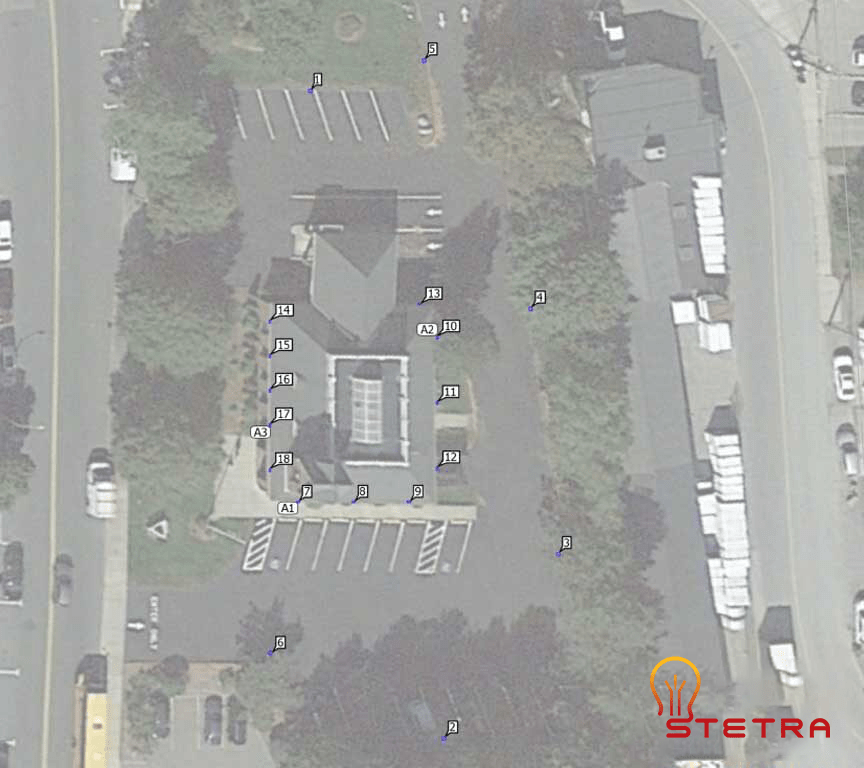
3. Calculation Points
Calculation points show foot-candle values at specific locations. Designers place these points across the calculation area to measure lighting performance throughout the site.

In addition to false-color and isoline views, photometric plans also include detailed point-by-point calculation grids.
These grids show the individual foot-candle values used to evaluate average, minimum, and maximum illuminance levels across the site.
4. Calculation Surface
The calculation surface summarizes lighting performance data for the selected zone or area.

- Ē – average illuminance across the calculation surface
- Emin – minimum illuminance value on the calculation surface
- Emax – maximum illuminance value on the calculation surface
- Ē/Emin – average-to-minimum uniformity ratio
- Emax/Emin – maximum-to-minimum ratio
These values help designers evaluate both the overall light level and the consistency of light distribution across the space.
When a Photometric Plan Is Required for Approval
A photometric plan is often needed when a project requires lighting verification before installation or review.
Common applications include:
- Parking lots and site lighting
- Warehouses and industrial buildings
- Sports fields and recreational areas
- Car washes and gas stations
- Large commercial interiors and exterior work areas
A clear photometric plan helps reduce guesswork by showing expected light levels before the project is installed.
Why a Photometric Plan Is Important
Photometric plans are important because they help the project team verify lighting performance before installation.
- Help verify required light levels
- Improve visibility and safety
- Reduce over-lighting and wasted energy
- Support design review and project coordination
- Help identify dark zones and poor uniformity early
You can also explore some real-world parking lot examples in our photometric analysis case studies.
How Long Does It Take to Create a Photometric Plan?
The time required depends on several factors:
- Project size
- Number of fixtures
- Complexity of the layout
Small projects may take a few hours. Larger or more complex projects may take several days.
At Stetra Lighting, we typically deliver a professional photometric plan within 1 to 3 business days.
For a quick estimate of lumens needed for a space, you can also use our lumen calculator.
FAQ About Photometric Plans
What is a photometric plan?
A photometric plan is a lighting calculation drawing that shows how light is distributed across a defined area using real fixture data.
What does a photometric plan include?
It typically includes fixture locations, mounting heights, point-by-point values, average/minimum/maximum illuminance, and lighting uniformity ratios.
When is a photometric plan required?
It is often required for parking lots, outdoor lighting, commercial developments, sports lighting, and other projects where lighting performance must be reviewed for design approval or permit submission before installation.
What is the difference between a photometric plan and a photometric report?
A photometric plan is usually the drawing page showing the layout and calculations. A photometric report may include the plan plus supporting calculation pages, product data, and fixture schedules.
Which software is used to create a photometric plan?
Photometric plans are commonly created using professional lighting software such as DIALux EVO and AGi32, based on manufacturer IES files.
Final Thoughts
A photometric plan is a practical tool for designing safe, efficient, and well-documented lighting systems. Whether the project is a parking lot, warehouse, sports field, or commercial site, a properly prepared photometric plan helps the team evaluate expected lighting performance before installation.
If you are planning a new lighting project or upgrading an existing one, you can order a professional photometric plan directly through Stetra Lighting.
If you are upgrading or building a parking lot, sports field, warehouse, or other space with new lighting, you can request a professional photometric plan by clicking the button below and filling out the form.
Ready to move forward with your lighting project? Click below to request your photometric plan.
Order Your Photometric Plan👉 Want to see real project examples? Explore our parking lot photometric case studies.
👉 Need target light levels for outdoor projects? Read our guide to foot-candle levels for outdoor lighting.
Pingback: 11 Best Practices for Contractors Working In Warehouses | LEDLightingSupply.com