Wall Washing vs Wall Grazing
Wall washing and wall grazing are two of the most used techniques in architectural lighting. They look similar in photos, but they are designed for different goals. If you pick the wrong one, the wall can look patchy, harsh, or flat.
This guide is for designers, architects, and contractors who want a clean result on real surfaces. It focuses on interior wall wash lighting design, fixture placement, and the practical checks that prevent scallops and hotspots. Both techniques are commonly specified as part of professional lighting design services, where fixture optics, spacing, and surface finishes are coordinated.
Wall Washing vs Wall Grazing: The Core Difference
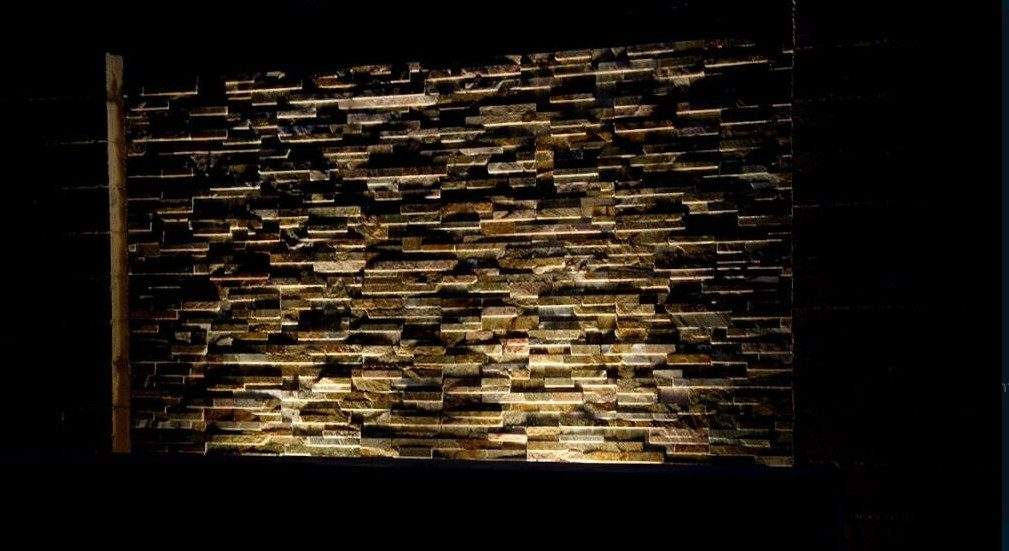
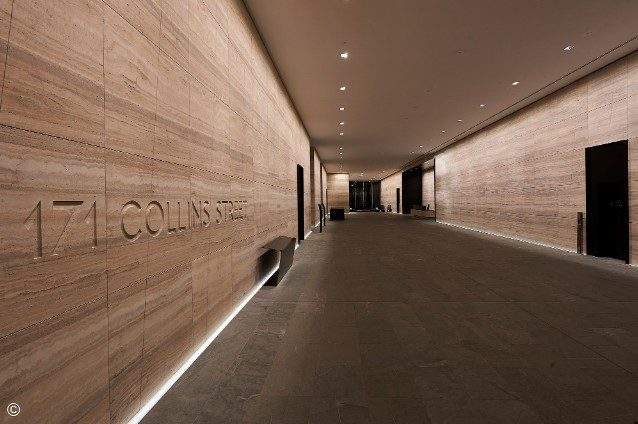
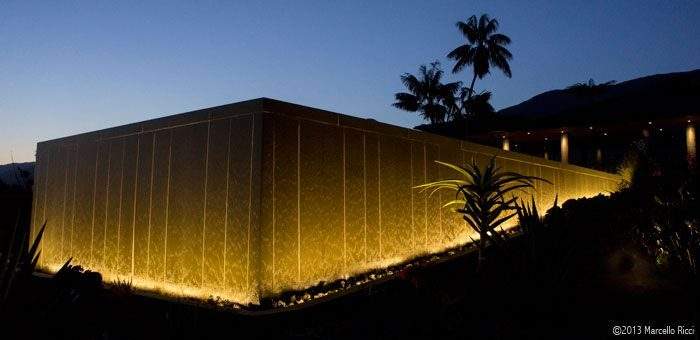
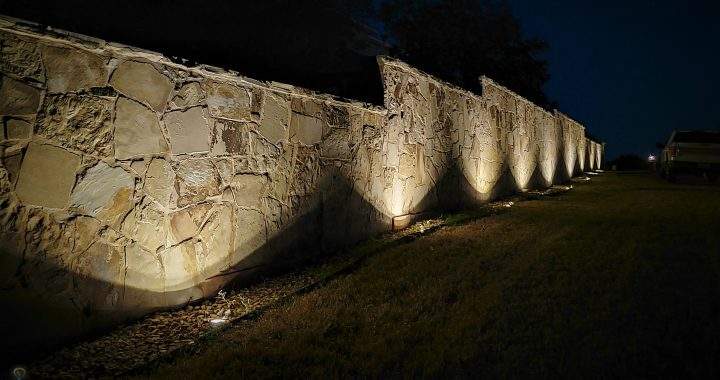
Wall washing is about making a wall look evenly bright. Wall grazing is about making a wall look textured. The difference is not the wall. It is the fixture position, beam control, and how steep the light hits the surface.


Use wall washing when you want calm, uniform brightness. Use wall grazing when the material is the feature. Texture that looks amazing with grazing can look messy if the wall is uneven or the spacing is wrong.
How It Works in Practice: Placement, Optics, and Controls
The visual result comes from geometry. The same lumens can look “premium” or “cheap” depending on offset from the wall, mounting height, and beam spread. Interior wall wash lighting design is mainly about controlling angles and uniformity.
- Offset from the wall: farther usually smooths the wall. Closer usually increases texture and shadows.
- Optics choice: use wall wash optics or wide distributions for washing, and tighter beams for controlled grazing.
- Glare control: shield the source. Keep the beam on the wall, not in the eye line.
Practical Details
Start by deciding what the wall needs to look like. Then build the layout around that. For washing, prioritize uniform vertical illuminance. For grazing, prioritize controlled contrast without harsh glare.
- Washing target: consistent brightness from top to bottom with minimal scallops.
- Grazing target: consistent “rhythm” of highlights with no blown-out hotspots.
- Verification: check the IES file distribution and review results in a photometric plan before installation.


Common Mistakes and Visual Comparisons
Most “bad wall washing” is actually a spacing and aiming problem. Most “bad wall grazing” is a surface tolerance problem. Use these visual checks before you lock a layout.
- Fix 1: if you see scallops, reduce spacing or switch to a wider / wall-wash optic.
- Fix 2: if you see glare, add shielding, lower the brightness, or change the aiming angle.
- Fix 3: if the texture looks “too harsh,” increase setback from the wall or use a softer distribution.
Real Project Application: Choosing the Right Method
Here is a simple way to decide. If the wall is a backdrop for circulation, signs, or artwork, choose washing. If the wall material is the feature, choose grazing. In both cases, confirm the result with a photometric plan using the exact IES file for the selected fixture.
When you want confidence before installation, verify spacing, angles, and brightness on the wall. That is where a professional photometric plan saves time, avoids rework, and prevents visual surprises on site.
Get a Professional Photometric Plan
We create accurate photometric plans ready for permitting, contractor installation, and real-world performance.
Key Takeaways
- Wall washing is for uniform brightness. Wall grazing is for texture and shadow.
- Placement and optics create the effect more than lumens do.
- Always confirm results with the real IES file in a photometric plan before installation.
If you want a clean result the first time, plan the wall effect early. Then validate fixture choice, offsets, and spacing in a photometric plan. If you need help, Stetra Lighting can model your exact surfaces and fixtures and deliver a permit-ready layout.